Paper Cut Greetings
Paper Cut Greetings: Crafting a Layered Great Dane Profile
Layered paper cut art looks intricate and sculptural at first glance, but the secret behind it is remarkably simple: breaking down a subject into stacked organic shapes, separated by light and shadow.
Trying to recreate a full-body Great Dane with its long legs and muscular torso can feel overwhelming for a first project. That is why we start small—with the noble, unmistakable profile of the head.
The Concept: Thinking in Layers (Back to Front)
Instead of drawing lines with a pen, you create silhouette sheets. Think of it like assembling a flat relief sculpture in 5 distinct tiers:
- The Background Sheet (Base):
A solid, neutral cardstock (warm cream, soft oatmeal, or pale sand) that frames the entire piece. - Layer 1 – Base Silhouette & Deep Shadows:
The entire outer silhouette of the head and neck in your darkest mid-tone (charcoal or dark taupe). This layer will also form the visible shadow behind the drooping jowls and ears. - Layer 2 – Mid-Volume (Muzzle & Neck Base):
A slightly lighter shade that defines the main structure of the neck muscles and the lower jaw. - Layer 3 – Forefront Highlights:
The brightest paper tone. This sits on top and captures the raised cheek plane, the bridge of the muzzle, and the outer fold of the ear. - Layer 4 – Tiny Accent Details:
Delicate individual cuts for the black leather nose, the expressive almond eye, and a hint of pink inside the ear.
Two Ways to Build It
fine or ... bolder
Option A: The Digital Workflow (Illustrator, Procreate, or Kittl)
- Keep curves smooth: Use vector pen tools or smooth brush outlines. Avoid sharp jagged edges—real cut paper always has smooth, flowing cuts.
- The Drop Shadow illusion: Apply a soft drop shadow to each layer (Opacity
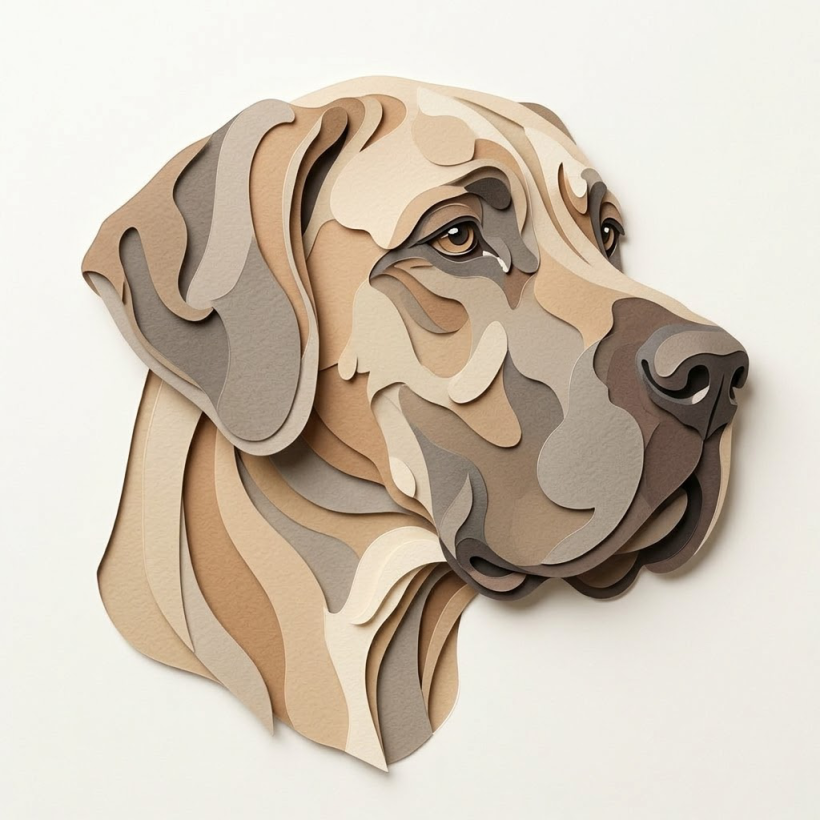
Handmade:
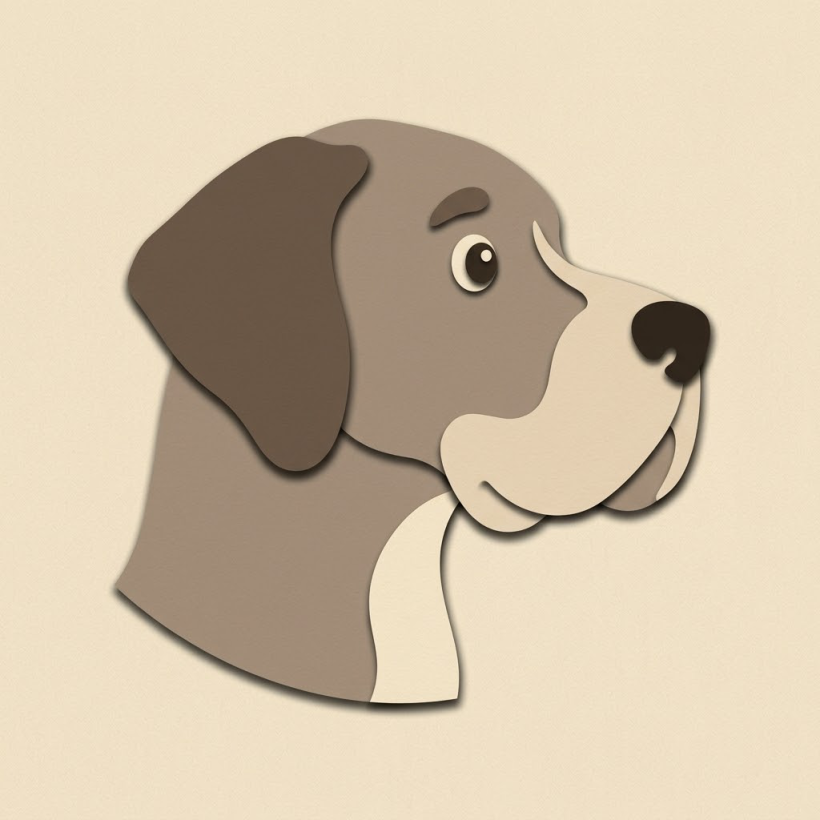
bold, easy version:
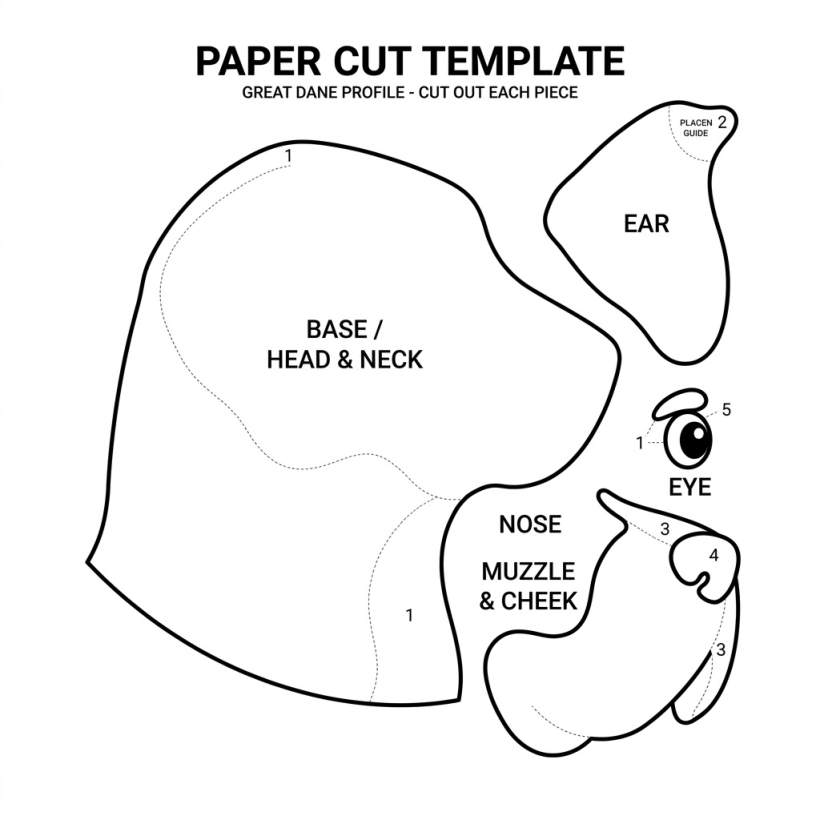
Paper Cut Greetings: A Simple Comic Great Dane Template
Layered paper art doesn't need to be hyper-realistic or overly complex to look striking. In fact, bold and slightly whimsical shapes often give a piece even more personality!
Here is a super accessible, comic-inspired Great Dane head profile you can cut and assemble in under 15 minutes.
The 5 Essential Cut-Out Layers
Instead of dozens of tiny muscle lines, this design is reduced to just five fundamental shapes:
- Layer 1: Base Silhouette (Neck & Head Base)
A large, clean shape that establishes the overall outline and posture of the dog. - Layer 2: The Floppy Ear
The iconic hanging hound ear that adds character and instantly defines the breed. - Layer 3: The Muzzle & Cheek
A curved overlay piece creating that signature deep, gentle Dane jawline. - Layer 4: Nose & Eye Accents
Bold, rounded dark cuts that bring life, warmth, and a friendly expression to the face. - Layer 5: Collar or Small Detail (Optional)
A pop of color at the neck to give your greeting card an extra handcrafted accent.
How to Assemble: The 3D Pop Effect
The magic happens when you lift the layers off the page:
- Materials needed: Sturdy colored cardstock (around 200–250 gsm), scissors or a craft blade, and double-sided 3D foam tape (1 mm thick).
- Stack from bottom to top: Place your base silhouette down, apply small foam pads behind the ear and muzzle layers, and press them gently into place.
- Let the light do the work: The tiny gap created by the foam pads casts real, natural shadows that make your flat paper shapes jump right off the card.
Grab your scissors, pick your favorite paper colors, and give your gentle giant some dimension!
Also als printable template: